“Advanced Fundamentals” may sound like a contradiction but when it comes to playing pool there is A LOT that you need to know to be rock solid with your form and execution. There’s nothing more important to playing consistently and improving than having the correct fundamentals to build your game on.
In this AMAZING instructional video from Florian “Venom” Kohler and RUNOUT Media, you’ll learn all of the intricacies of a proper stance, approach, grip, bridge and stroke. BONUS: Florian also give some pointers on how you can achieve maximum spin for insane draw shots!
[begin transcript which has been modified for the reader]
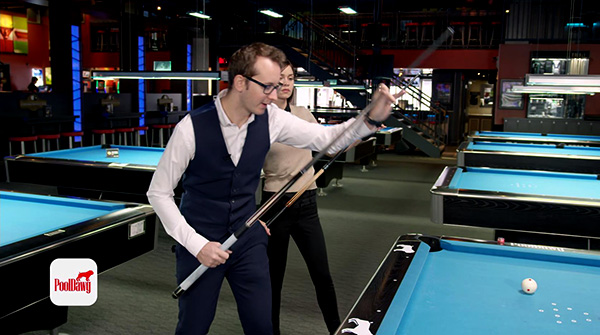
Hi, I'm Florian "Venom" Kohler.
Hi, I'm Valerie Bedard.
Today, we're going to talk to you about advanced fundamentals. We're going to cover everything from your stance, the basic stance, to the stroke, and how to execute the best stroke possible to get the maximum amount of spin.
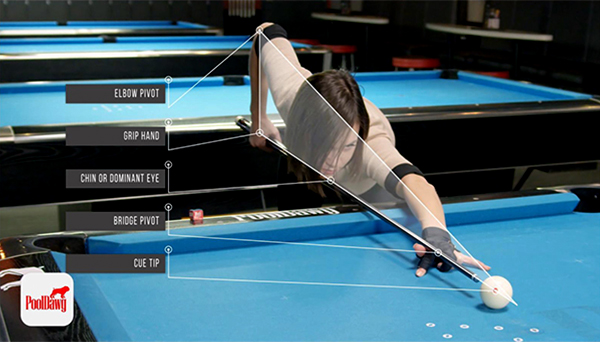
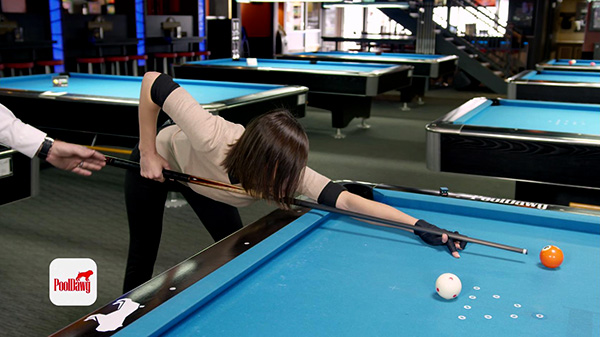
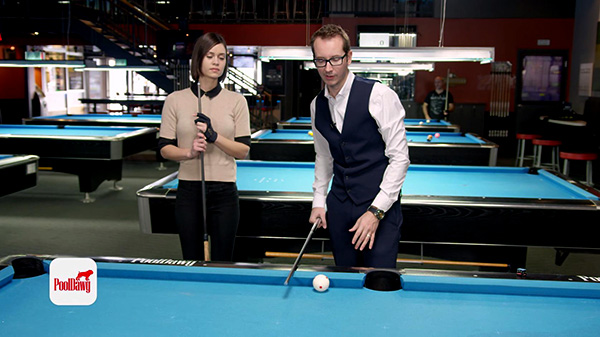
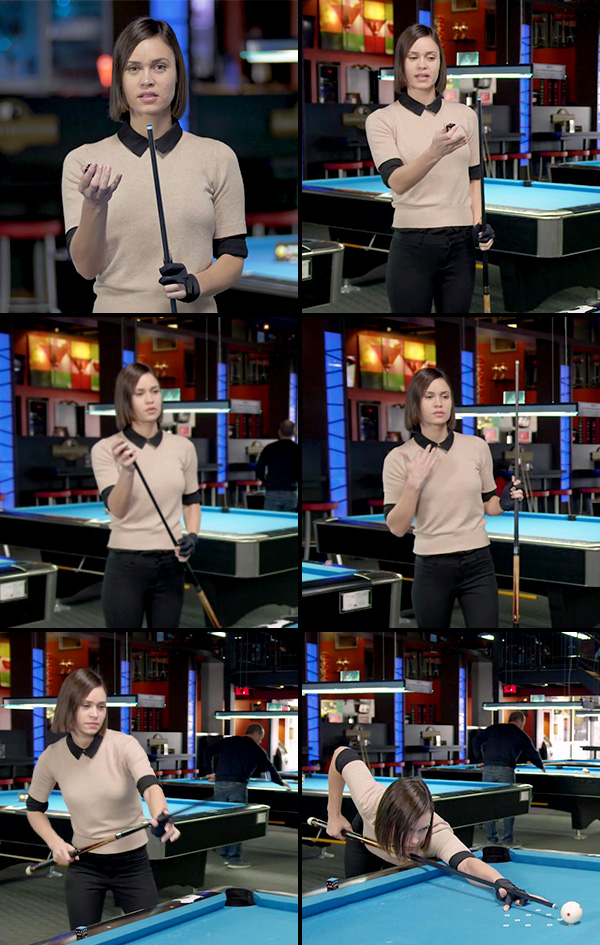
Let's start with, in my opinion, what's the most important; the vertical alignment. So Valerie here is going to demonstrate you how to shoot a shot, like a proper stance. So we're going to start from the five here. So as you can see, the five is going to be in line with the cue ball, in line with the cue is her hand, right there, up to the wrist here, the forearm and the shoulder. So everything is in a vertical straight plane there. So the thing is, it doesn't really matter if you have a great stroke, a great bridge, or anything like that. If you don't have this vertical alignment, you will not be able to shoot straight. So really, really important to have that.
The Proper Pool Stance
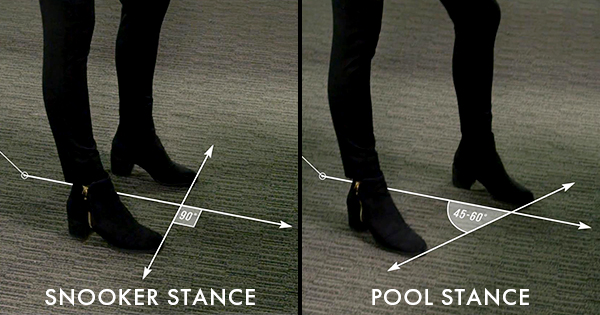
The stance and the foot stance is particularly important. So I want to talk about the snooker versus the pool stance first. I know it's a big controversy, but the two games are quite different, so you really need two different stances. So let's cover the snooker stance first. So Valerie's going to demonstrate the one. So what you can see is the feet are basically on the same line. So it's basically the foot line is perpendicular to the cue. Now it's not really a proper pool stance, in my opinion, because in pool, you need to get a lot more position play, so you need to free your right arm. So she's going to demonstrate the proper pool position now. And as you can see, the feet are not really aligned, it's more of an angle, so I'd say 30 degree angle type thing, and that's what help us free the arm.

In my opinion, this is the proper pool stance. Now the one thing if your, Valerie, if you want to go back down again, we can look as the back foot as well. So I know there's another thing here. So this, she's keeping it pretty straight, which is really good. Some people decide to get it lower a little bit, but you really don't want to get too low like this, because that's too heavy on you, it's not comfortable. And the whole point in pool is to be as comfortable as possible, especially when you're stroking. So just make it so you're comfortable and nothing feels heavy and hard on you.
Stepping Into the Shot
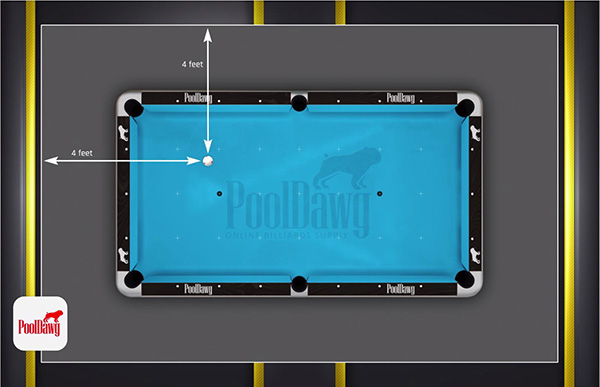
Let's talk about how to address the cue ball now. So the first thing is, and probably the most important, is you always have to first start outside the box. What I call the box is the four feet distance between, between here, there, and the cue, and then the object ball. So you always want to go away from it because then you can step into it and dominate the shot rather than feel like you're threatened by it. So that's one thing.
Now, the next thing you got to know is the distance you have in between your tip, your arm, grip arm, and your foot here. So this is basically something you'd have to remember. This is your distance. This is nothing we can really teach you, you just figure out by yourself.
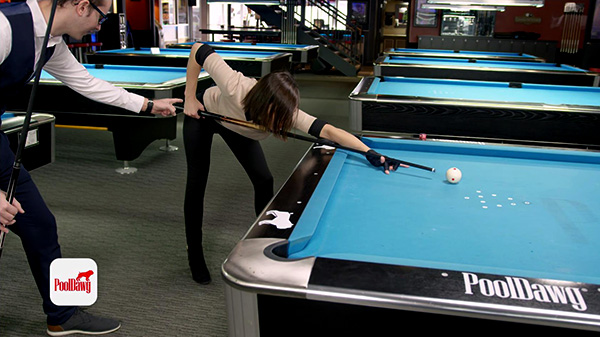
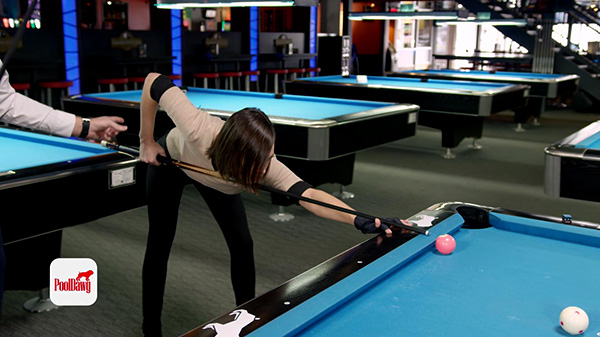
So I'm going to have Valerie here demonstrate how she gets down into the shot and address the cue ball. So as you can see, she's stepping away from the table coming in there and she's going to stand right there. As you can see the hands right there, right above the foot, exactly what we're talking about. You can see that she really was away and stepped inside the shot. Now we're going to do one more time. Can you show us again?
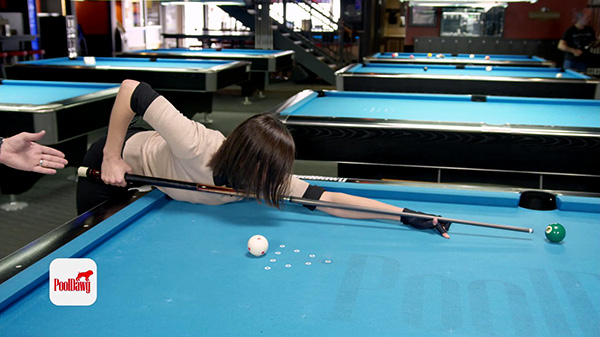
You can also see the descent. So when I mean the descent, it is how she gets the cue down. So this is the next really important thing. You don't want to go across, swipe this way, swipe this way. You really want to go down as much as possible in a straight line, again, it's because it's going to make you perfectly in line and keep you straight.
The Proper Back Hand Grip Positioning
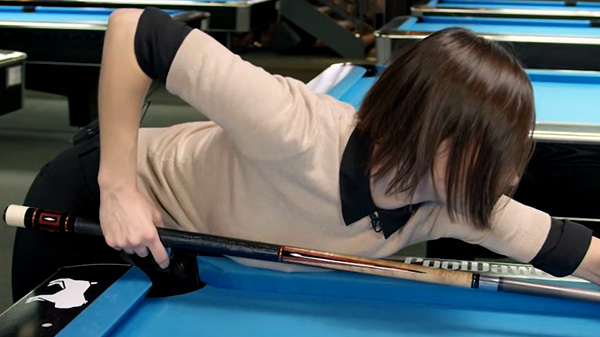
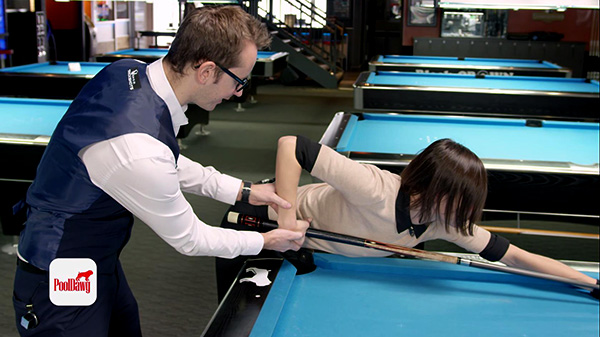
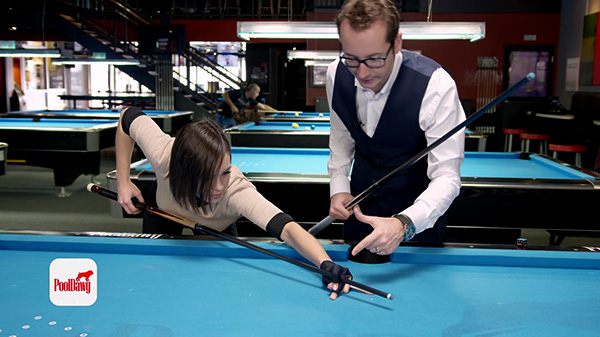
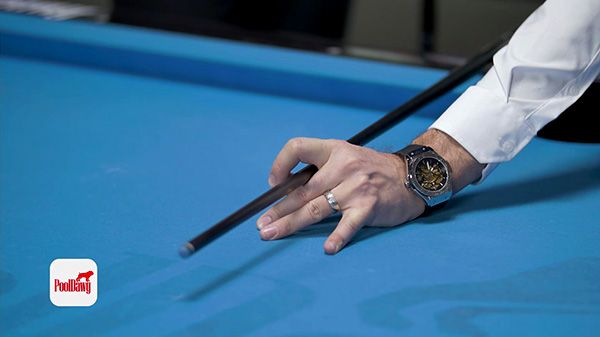
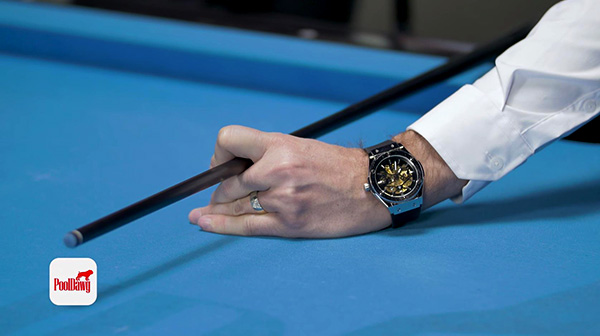
The back hand, or a grip hand, this is another very important part of your stroke. The biggest mistake most people do is they grip it too hard like this, and this is really not good for you because you're going to miss on the left or on the right, your cue's going to move a little too much. So the best is really to have a loose grip. And I like to really use basically only the second finger. So I'm going to show you a little exercise.
Actually, Valerie is going to do it. She's going to get in position right there. And she's going to hold the chalk in between her index and her thumb. So I'm going to put it right there. And you see that basically it's going to force you to not hold it tight. And it's one little exercise you can do to just really help you out, for the rest you can see her wrist is right straight in line.
A lot of people have an issue, it goes like this. This is really bad for you, so we're going twist it. And then the other side as well is also pretty bad. So you really want try to get it in line as much as possible. This is going to really help you shoot straight. The last part is on the pinky. I don't know if you can see from here, but this one is really not used and pretty much the last one as well. So you're really only using one, two fingers. And really what's going to do is the loose grip is going to help you to really stroke the ball through and really helps you get maximum spin.
So what's really important is that 90 degree forearm, upper arm angle, which I'm going to show with Valerie right now. So she's going to get in position. The important part is to have that angle, that 90 degree right angle when the tip is hitting the cue ball, so the contact point is when your arm is perpendicular to the cue.
Now what's really more important than this is that the forearm is actually perpendicular to the floor. So not just this one, but actually this line here, this is what's going to make you hit the ball straight or not straight. Okay, that being said, you can hold the cue in different spot on the grip. Personally, what I do is I have three different lengths of grips for three different kinds of shots.
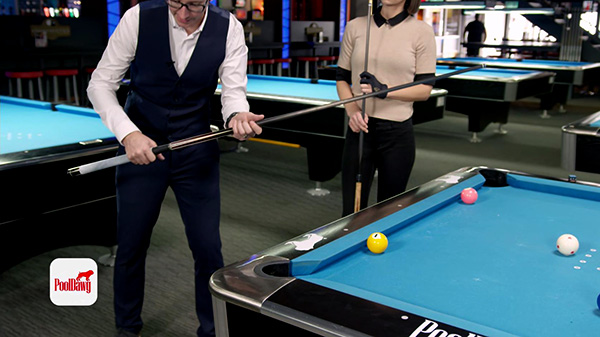
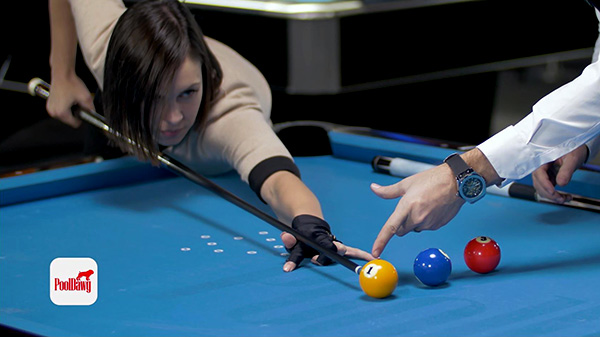
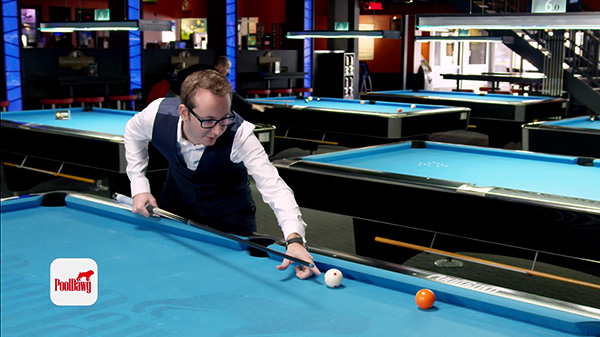
So let's say we're close to the rail like this on the one ball. I'm going to hold my hand closer here so I can shorten my grip so I can have the 90 degree angle right when I hit the one ball. Now for this is a close shot, little short practice stroke.
Let's say I have a standard shot. You can see I naturally move my hand towards the middle of the cue, right there. And that's, again, because my regular stroke is going to be longer, I got more, I'm down on the cue ball, so this is done here. Now let's do a long shot.
You can see on the long shot I'm naturally, again, moving my right hand to the very back of the cue, and same thing it is to get to my impact point perfectly with my forearm.
Okay, now this is my solution, however, a few people do something a little different and Valerie actually does. So what she does is she keeps her hand at the exact same spot, but she moves her body, shift her body forward or backward.
So you can see here, she's at the same spot right there.
Then we're going to go into the five ball, see how she does it. You can see her right hand stays at that exact same spot. However, she is still hitting the ball, right here that forearm is still 90 degrees whenever she hits the five. Now on the last ball, she will have to move no matter what a little bit, but she will probably not be as drastically as me towards the back of the cue.
As you can see, she is way closer than me when I was right there. And again, this is same thing that forearm perpendicular to the table, right there when she has the six ball.
Hand Bridges For Pool: Open, Closed and Rail Bridges
Let's talk about bridges now. I know the lesson title is Advanced fundamentals, so bridges are pretty basic. But what we're going to try here is we're going to try to give you some pointers of how to improve your bridge.
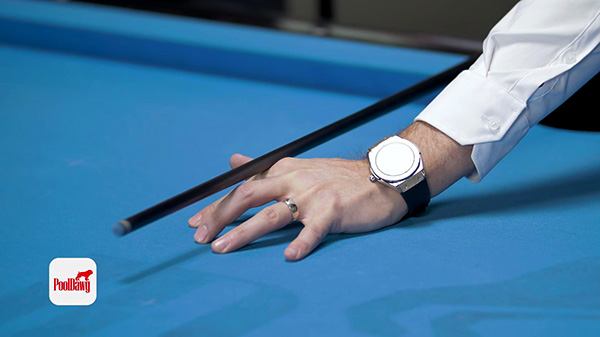
So let's start up with open bridge. So one of the common thing I see when I teach people is a lot of people just keep their hand like this and after a while, it starts to really hurt here, sort of like a burn simply because they're using too much of the meat of the hand.

Meanwhile, if all you have to do is just turn this hand a little bit, you got a little less contact and this makes it a lot easier and it hurts a lot less. On the long run, you really can practice a little better.
Now, again, on the open bridge, we're going to keep going, when you're trying to raise, so this is what I do. I usually like it, pretty solid. But however, a lot of people, a lot of pool players will get those fingers right back there, also really solid.
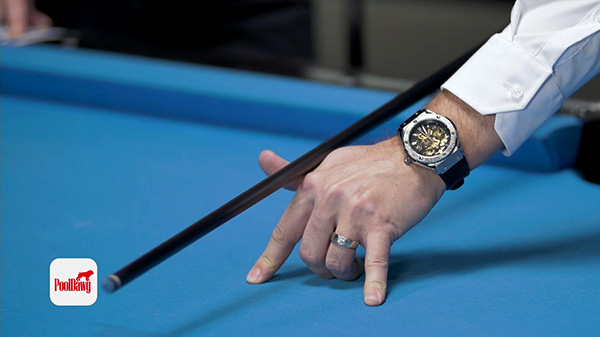
And this is going to help you, again. Solidness in the bridge is really what's most important. Let's keep going on the closed bridge here. So Valerie has probably one of the best closed bridges I've ever seen. So she's going to demonstrate right now. And as you can see whenever she does it, so all those three fingers are together. They're touching at a spot and there's really no gap in between the fingers there. Also she's able to bend her finger, which is exactly why it makes it a really strong bridge.
So a lot of people are going to do something like this, maybe because they can't bend the finger as much, maybe for a reason that I'm not too sure.
But anyway, if you have sort of a gap like this, close bridge is not for you, this is getting a little too dangerous because you're not going to really hit the right spot on the ball. Now, if you keep going under close bridge again, we have different ways to raise your bridge same way. Of course, still the standard you're going to try to keep your palm on the table. However, if you've got to go up, you can always do something like this.
We can always also, what I call the three cushion bridge, which is a bridge that we use a lot in three cushion because the ball is bigger, so higher, which is pretty much go like this. And it naturally raises the height of your tip. So that was going to help you to put a lot more follow.
And meanwhile, it might feel a little less solid, the trick is to just simply go on the side here and helps you just keep down in stability.
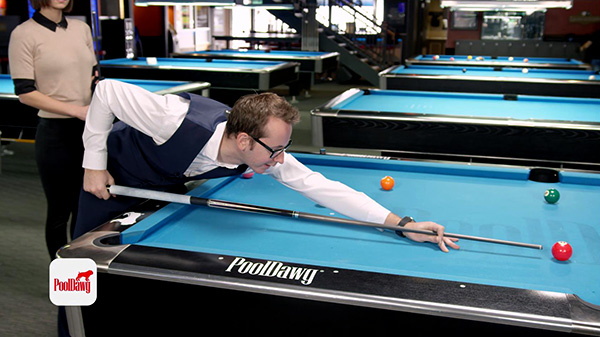
Let's cover some rail bridges now. So rail bridges- one of the biggest misconceptions is people trying to always put angle on a shot. And really when you're in the bridge, especially, I'm going to grab a ball here; you're trying to be as parallel as possible to the table like this, right?
So in my opinion, the best one is probably something like this.
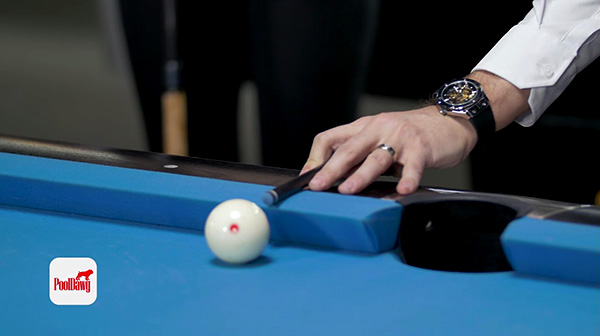
This really helps you keep down on the table and really hit the ball correctly. I'm going to have Valerie demonstrate another type of bridge on the rail. And again, you're going to have to notice that a lot of pool tables, the rail is not flat, but actually going down.
And this is the reason why, is because this is going to help you put your finger there and still keep parallel to the table. So this is exactly the bridge I was talking about, right there, and helps you to really hit the ball well.
And I think there's maybe one last type of bridge too, that is literally going, putting your fingers on the metal edge almost. And this is really when you are trying to stroke the ball through.
And again, the trick though is to really stay as parallel as possible when you do the rail bridge and not angle up. So this is something you don't want to do, except if you have to for a reason that you need to put a lot of spin or something like that. But if you don't have to, you never want to raise your cue angle.
Following Through For A Good Pool Stroke
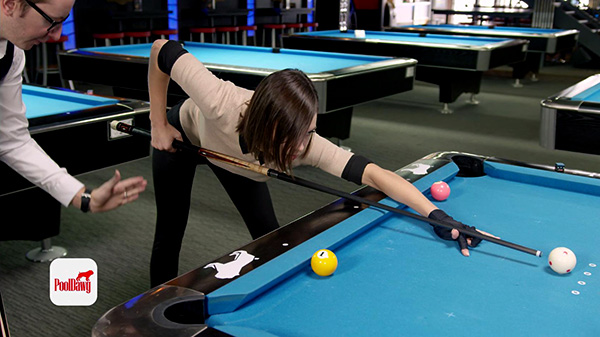
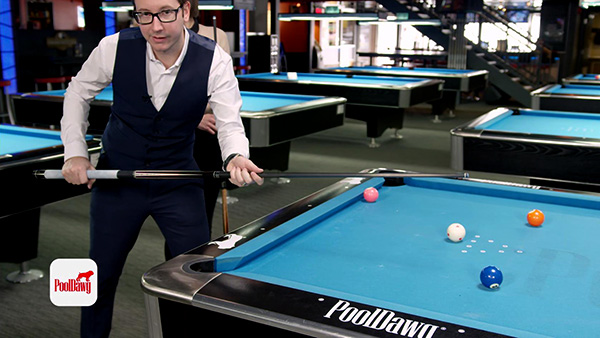
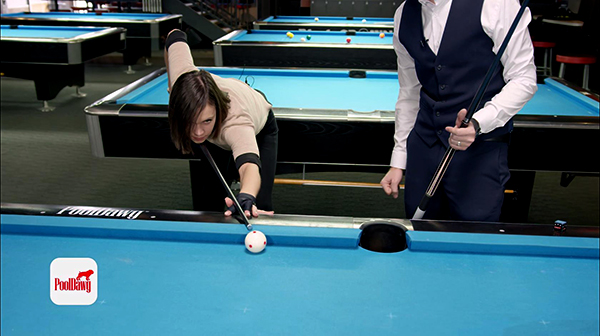
Let's now talk about stroke. This is my favorite part because how good your stroke is, is going to determine how much spin you can put on the cue ball and how good of a draw or follow you're going to get. In order to show what I have in mind, we have three balls here, the one for a soft shot, the two for a medium shot, and the three for hard shot. So what I want to talk about first is the pendulum thing. So basically Valerie is going to get in position and I'm going to try to show you here. So she's going to try to shoot all these three balls in the pocket out there.
And I want to show you exactly what a thing here. So whenever we got this, now, if you pull back, you've got this distance here, right? So this distance right there is going to apply here. So we've had 50% here, 50% there.
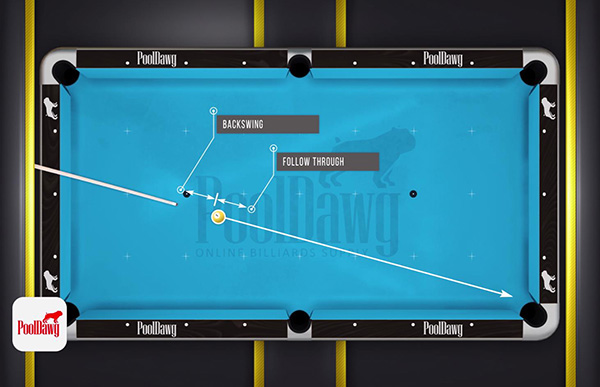
This is basically how much follow through she's going to get on a soft shot. So I want you to visualize that. You'll see it, it's going to go right there. There you go. Now we're going to do the same process. I'm going to repeat it for a medium shot.
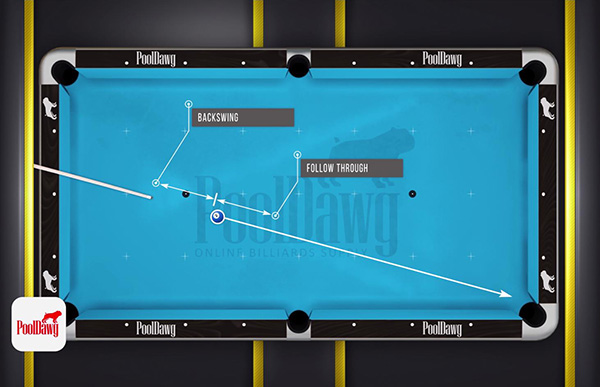
You're going to see she's got a longer bridge. I'm going to try it again to show you what I'm meaning here.
There we go. And she pulls back to about here. Okay, so if you transferred that, again, we should be somewhere around here and that's going to be her follow through. Now you can see the follow through is longer on the medium shot than the short shot. The last one is there hard shot, and I'm not even going to demonstrate it, I'm just going to let you shoot it and you'll see the follow through is going to be right there. And what I want you to understand is the more you follow through, the more you're going to get power and spin on the shot. And that's basically how you get a better stroke.
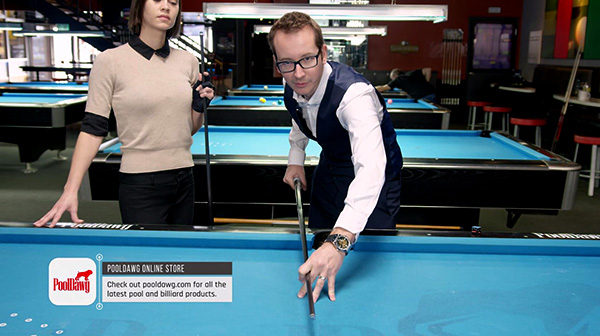
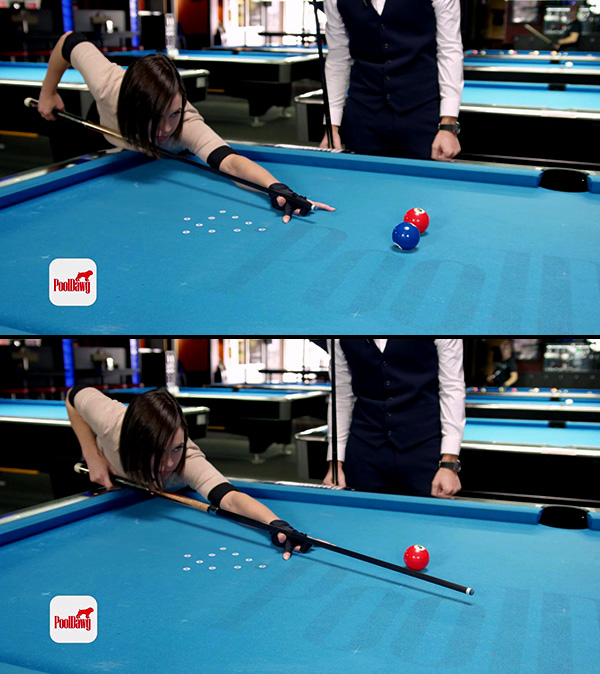
Let's establish a pre shot routine and put all these elements together. Basically, what we're going to try here is to shoot the cue ball into the three, make the three in the corner. So Valerie's going to guide us through her thought process on how to make this.
Valerie:Okay, so one good thing I like to do is keep my chalk in my hand until I make the right decisions. So now in that case, I would play center ball the three in the corner. So I chalk, put the chalk on the table, I step out, visualize the shot, and then I step in.
Okay, so now you can notice how her forearm is in line, the cue is in line, the bridge is solid. We know by the length of the bridge it's going to be a medium stroke. You can see this practice stroke the right way, never deceleration in the practice stroke. And she's pretty much ready to go here. So she's going to shoot. There we go. And you can see, she stayed down on the shot. Very solid bridge, the head stayed down, there was no deceleration, and all through the movement, it was a very solid, very consistent, and very smooth process. So this is pretty much what you're looking for in your game, just a perfect and smooth pre-shot routine that's going to lead you to a perfectly smooth shot.
Achieving Maximum Spin: Unleash Your Stroke
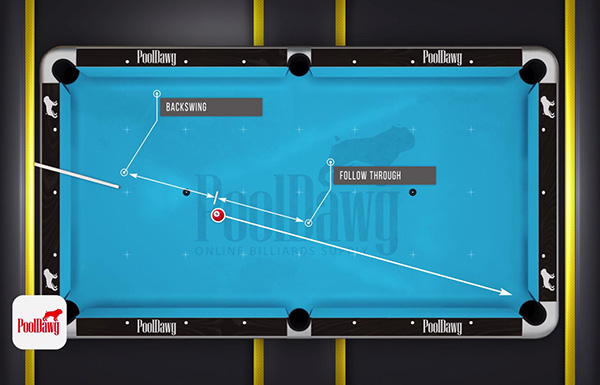
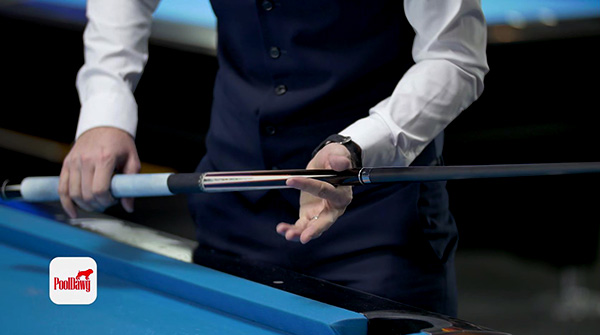
All this was simply leading to my favorite part of pool, which is get extreme spin on the cue ball. Now remember, if you have strong fundamentals to pre-shot everything in line, you can actually start to get crazy now. Now the biggest problem I see for people that lacking spin a little bit is their miscue circle is too narrow, meaning they only really go one tip or two tips out on the side of the cube ball. Up and down, same thing.
Meanwhile, you can really go a lot of outside the cue ball. With the proper tip, proper cue, proper balls, you can almost get half a tip away from the ball and still not miscue. So this is really important in order to get extreme spin. The next part is to follow through, when Valerie was demonstrating it was basically a 50/50 in front and after impact. In my case, it goes almost 25% more at the very end.
And it's not uncommon to go even more, if you really have to. So long follow through, a very long follow through is going to help you a lot. Loose grip, but even extra loose.
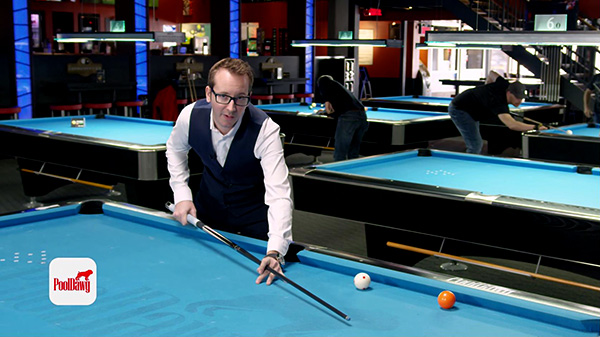
So use an extra loose grip about center of the cue and just launch the cue all the way and maximize every motion we talked about. This is purely spin, so in this case, aiming is a little less important. So you really just have to exaggerate every motion from pendulum to the follow through, and then how low and how you hit on the ball. So I'm just going to show you a little shot here, just the cue ball into the five and try to draw the cue ball as far as possible.
So again, you can see my pre shot routine, chalk, same way I'm going to do, get in line, out of box, step in to box, visualize. And instead I'm just going to go a little lower in the ball.

There we go. So you can see all the way everything, my follow through was long, loose grip, and that ball just traveled a couple of rails already and back to where it came from. So this is pretty much what you're going to have to do to get extreme spin. It goes same for side spins, the left, right, and same concept for top spin you follow through is really going to affect the way you're going to hit it. And if you get that little extra 25% follow through, you'll text me later.
Valerie:This was the Advanced Fundamentals. I hope you guys enjoyed the video. If you have any questions, please comment below.
As usual, don't forget to check out pooldawg.com for your pool and billiard supplies, and see you guys next time.
- RELATED ARTICLES
- Three Advanced Drills For Perfecting Your Stroke – By Mikey Verkruyse
- How To Improve Your Follow-Through - and Why It Matters – By Travis McKinney
- Loosen Up: How Too Much Tension Can Affect Your Game – By Tom Simpson