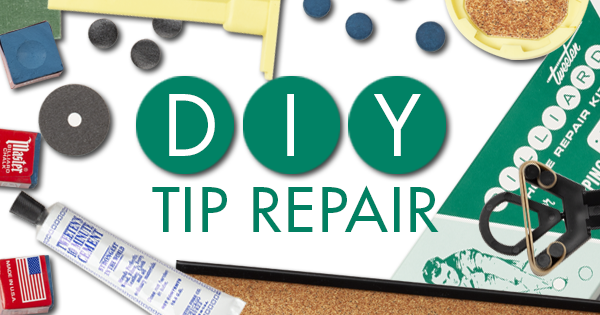
Replacing a Pool Cue Tip: 6 Easy Steps to do it Yourself
It’s like a bad dream. Your tip is worn out, you have a tournament coming up and you can’t get to your local cue repair guy, or maybe there isn’t a cue repair guy in your area at all! Well today is your lucky day! Today we are going to learn how to install a new tip on your cue using the Tweeten Cue Tip Repair Kit. This is something every pool player should know. Let’s get started.
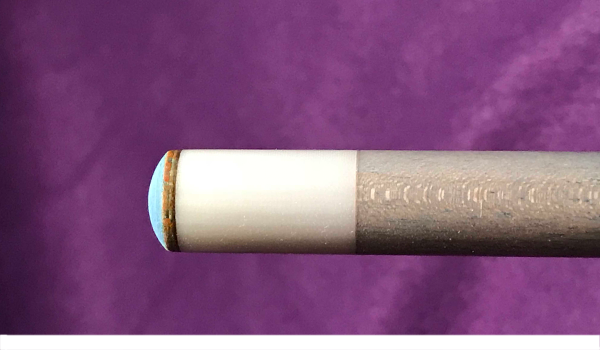
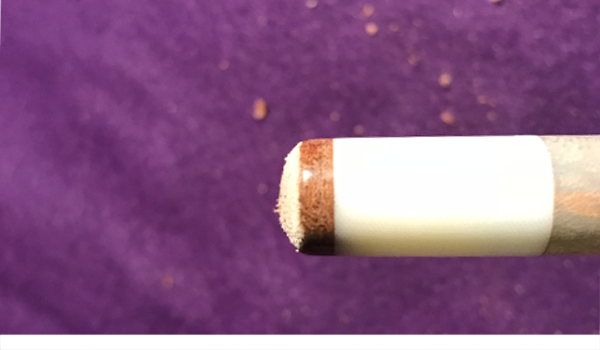
The picture below shows our poor, worn out tip. This tip is pretty low and in danger of being both detrimental to your game and possibly even damaging your ferrule.
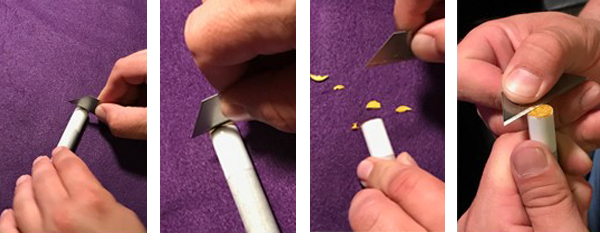
Step 1: Remove the Old Pool Cue Tip
The first step is to remove the old tip. To do this, you will need a nice sharp razor blade (please be careful folks, it’s hard to explain how you cut off your finger changing your cue tip). Try and get as close to the ferrule as you can. This may take a few passes with the razor blade. Just take your time and slowly remove any leather and excess glue as seen in the sequence below.
Step 2: Clean the Pool Cue Ferrule
Once you are satisfied with your job removing the old tip you need to make sure the top of the ferrule is clean and as flat as possible. To do this you will now use the rapid top sander included in the repair kit. Just place the shaft against the guide as shown in the following pictures and rotate until any leftover dirt and glue are removed from the top of the ferrule. Be sure to keep the sander nice and level.
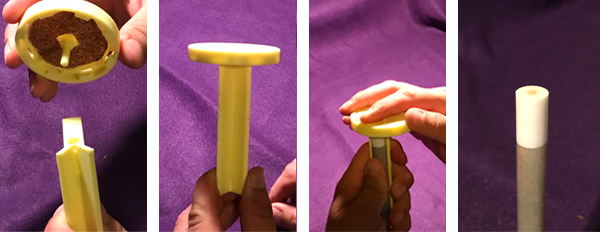
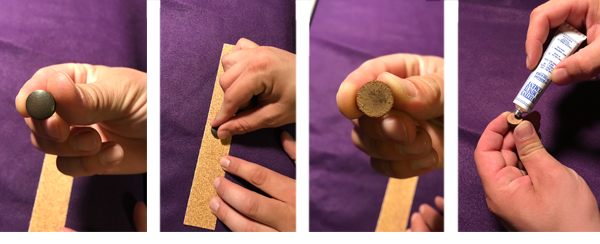
Step 3: Prepare the Pool Cue Tip
Preparing the tip is the next step in the process. To do this, take your favorite tip and use a piece of sandpaper to rough up the glue side of the leather. I do this by laying the sand paper on a flat surface to make sure as I sand the back of the tip I keep it perfectly flat and level. Sand the tip until it is nice and rough. It is important to make sure the tip is roughed up so the glue has something to adhere to. Apply the supplied tip cement or your favorite adhesive (I also recommend any type of gel super glue) to the tip.
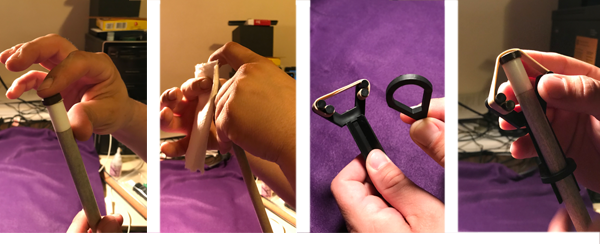
Step 4: Place the Pool Cue Tip on the Ferrule
In the following sequence, you will see the next step is to place the tip on the ferrule. Make sure to get the tip centered as best you can. Press firmly on the tip to make sure any air pockets are removed; the glue will push out onto the ferrule. While holding the tip in place, use some paper towel to wipe the glue that has now no doubt gotten on the ferrule. The more we can get off the ferrule now the less you have to worry about trying to sand off later.
Next, assemble the tip clamp that came with your kit. This clamp slips over the shaft and as you can see in the photo, you simply place the rubber band on the center of the tip and pull the clamp down. Use the slider to hold the clamp in place. Let the glue dry for 10 to 15 minutes.
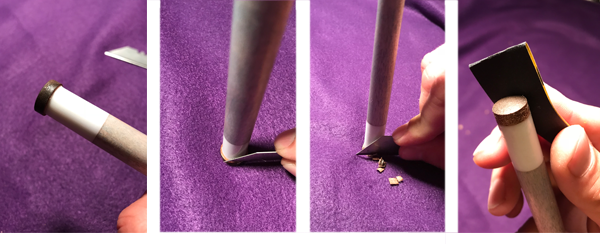
Step 5: Cut and Sand the Cue Tip to the Ferrule
The next step is the part that requires a little patience and some practice—cutting the tip to match the diameter of your ferrule. I like to place the shaft on a hard surface with the tip down as shown below. Use your razor blade to slowly shave away the sides of the tip. Don’t try to take off too much leather at once, it is easier to move slowly. When you get closer you can use your ferrule as a guide. Make sure you cut downward towards the table in as straight a line as you can.
(On a side note, don’t do this on your kitchen/dining room table….wives and or mothers do not appreciate small razor cuts in the finish. Don’t ask me how I know this.)
Once you have the tip the same diameter as the ferrule, you can clean it up some more and remove any flat spots from the razor blade using a piece of 800 grit sand paper. Be careful not to sand too much on your ferrule.
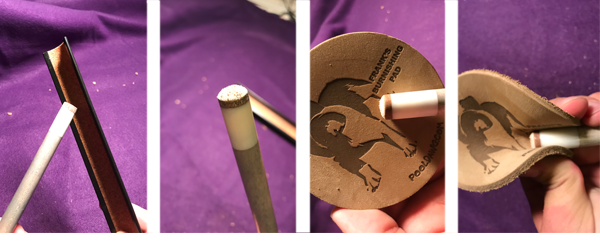
Step 6: Shape the Pool Cue Tip
So now you have a tip glued firmly on and the same diameter as your ferrule, but it is probably flat. Time to shape it up. Use your favorite tip shaper, or the shaper that comes in the kit. Sand the tip until you get the desired shape you prefer, dime, nickel etc. Once you have the tip shaped up, moisten the side of the tip (a little water works fine, but don’t get it too wet). Use a nice piece of leather to burnish the sides of your tip, below shows the Pooldawg Tip and Shaft Burnisher.
We now have our finished tip. Not everyone has access to a good cue repair person or even the use of a lathe to install tips, but there is no reason to worry now that you know how to put your own tips on. Your first attempts might be a little rough, but in time you will develop your own methods and your tip installs will improve.
Until next time.
Mikey V.
- RELATED ARTICLES
- How to Change a Pool Cue Tip – By Florian "Venom" Kohler
- Shaping your Pool Cue Tip – By PoolDawg Staff
- How to Choose the Right Pool Cue Tip – By Mikey Verkruyse
4 Comments