In order to have a winning pool game, you must have a winning bridge. The ever-important bridge is the hand that remains on the table and securely balances the pool cue while it's in motion. If you shoot pool right-handed, then you'll use your left hand for the bridge and vice versa.
The two most popular bridges used are the Open Bridge and the Closed (or Loop) Bridge. We'll get into the specialty bridges another time.
Making an Open Hand Billiard Bridge
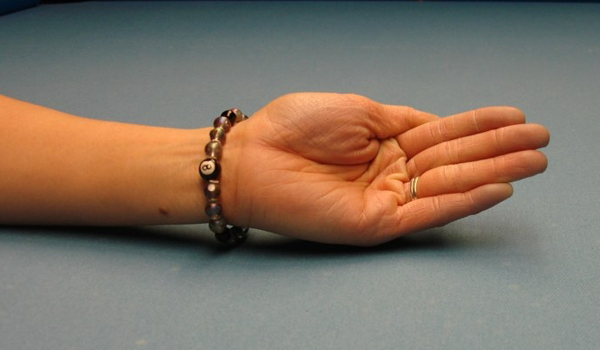
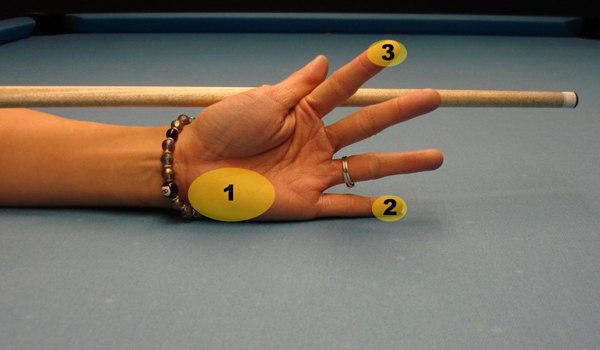
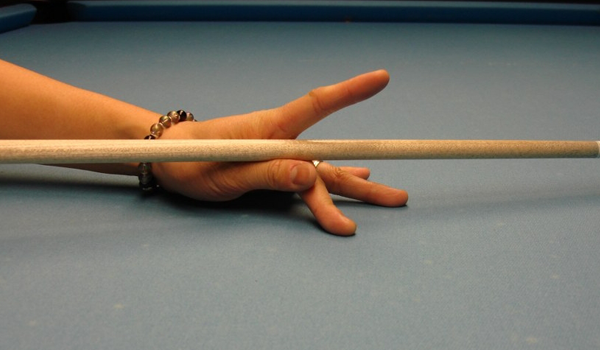
Let's start with the Open Bridge! To begin, squeeze your fingers together tightly. Now, flip your hand over and keep your thumb pressed securely against your index finger. This part is very important because it's where your cue will rest on your hand.
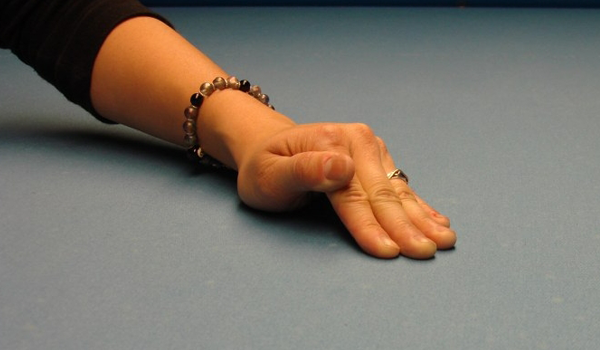
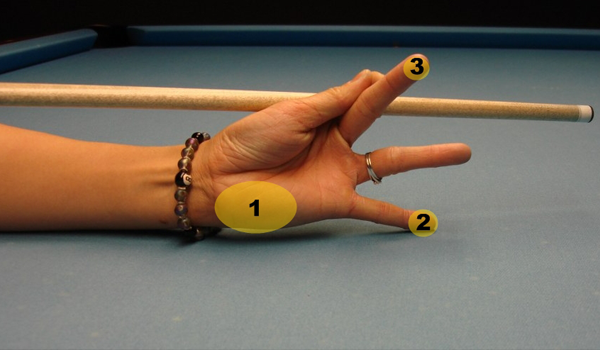
Now, spread your fingers apart for more stability, still keeping your thumb high against the side of your index finger. Create a secure fulcrum to balance your cue stick. With the Open Bridge, it's very important that you keep three main contact points firmly on the table at all times. This will create a very stable tripod with your bridge hand.
Here is another variation of the Open Bridge. You can tuck your ring and/or middle finger(s) under, but always keep the three main contact points on the table.
Making a Closed Hand Billiard Bridge
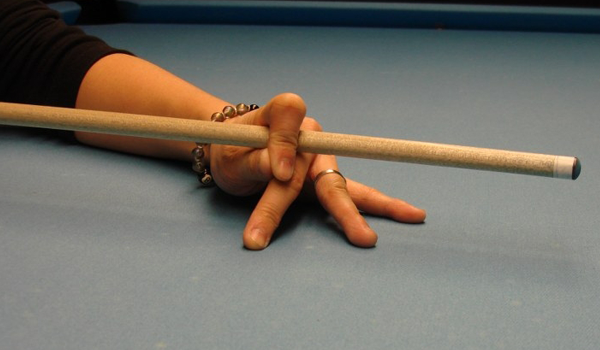
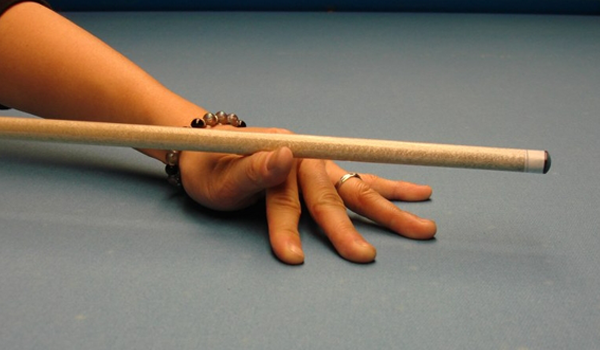
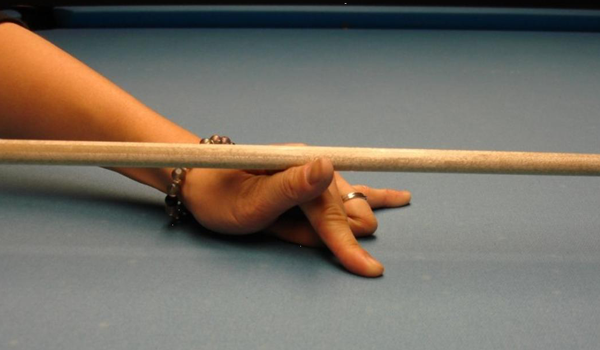
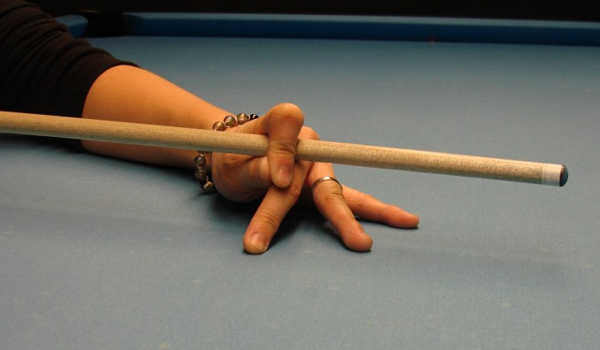
Now that we have a feel for the Open Bridge, the Closed Bridge will be a piece of cake! Instead of pressing your thumb against your index finger, lift your index finger and place your thumb against the side of your middle finger. Now, rest the stick on the new fulcrum you've created and loop your index finger over the cue stick, bringing the tips of your index finger and thumb together.
Again, be sure to keep the three main contact points firmly on the table at all times. For the Closed Bridge, the third contact point switches from the index finger to the middle finger. If your hands are tacky and your cue doesn't slide smoothly through your loops, you may need to consider a pool glove.
As a general rule of thumb, use the open bridge when aiming above the center of the cue ball, and use the closed bridge when aiming below the center of the cue ball. Of course, there will always be exceptions when using both bridges.
Helpful Hint: Make sure when you are aiming higher or lower on the cue ball, you make the adjustment with your bridge hand and not your stroke hand. This will help to keep your pool cue as level as possible.
 Frank Says: "Pool gloves will help your cue slide smoothly through your bridge hand. Even with sweaty hands or a dirty shaft, you'll feel the same consistent stroke without the mess of powders!"
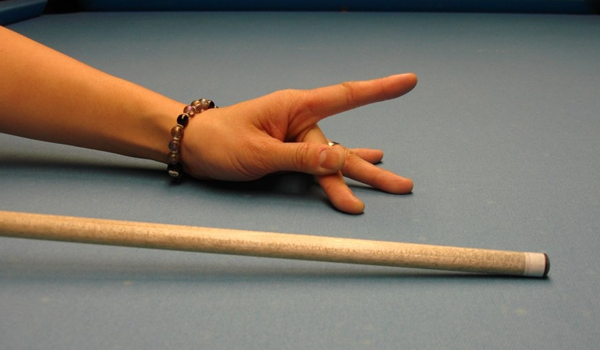
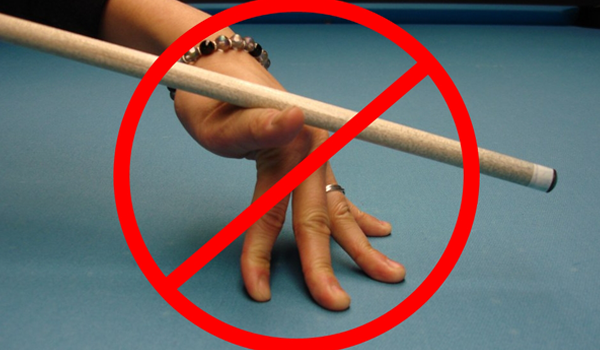
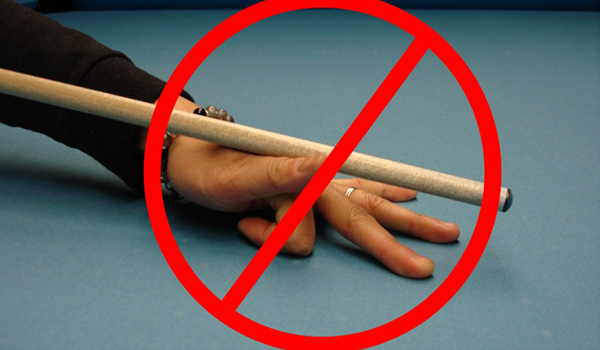
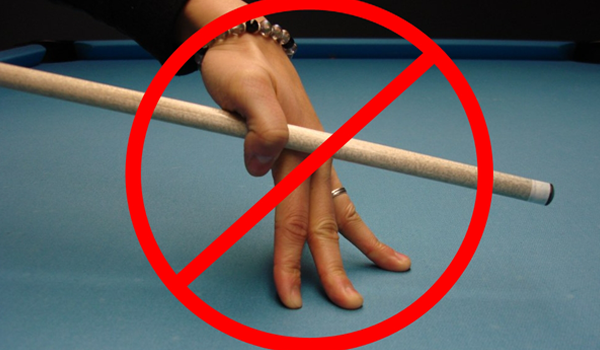
Examples of Faulty Billiard Bridges
These two bridges are not balanced and do not create a stable tripod.
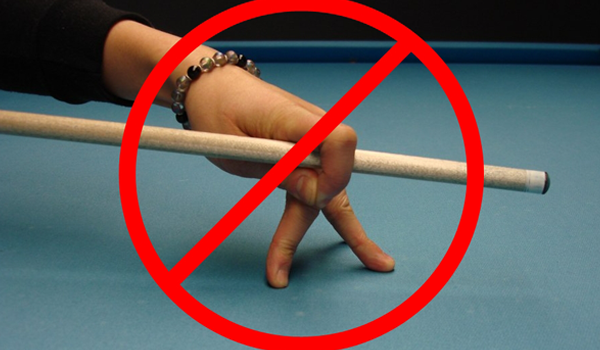
These two bridges limit us from adjusting our bridge height and contact point on the cue ball.
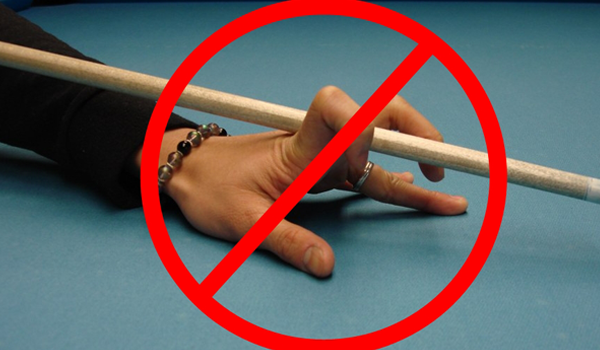
This bridge is both unstable and limits your ability to adjust your bridging height.
Player, writer, and Denver billiard instructor Samm Diep shares tips on basic care, instruction, and etiquette. Check back frequently for more articles.