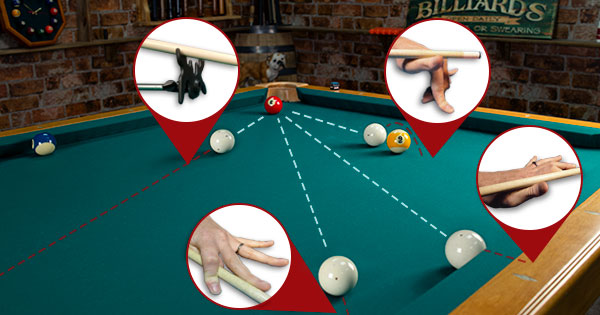
Your bridge hand can form various styles of bridges. Think of each one as the tools in your toolbox. There’s usually the proper tool for every job. You can pound a nail with the back of a screwdriver but it’s much more effective to use a hammer. Likewise, there’s an ideal bridge for every shot that comes up.
In the Bridge to Victory, we discussed the popular open and closed bridges that are most commonly used. Here, we’ll be learning some bridging exceptions. These instances include rail bridges, elevated bridges when there’s an interfering object ball, and the dreaded mechanical bridge. These are the less popular bridges that should still be learned and practiced.
The Closed Rail Bridge
This bridge is used when the cue ball is too close to the rail to bridge normally on the table but it’s not frozen against the rail (that’s a different bridge).
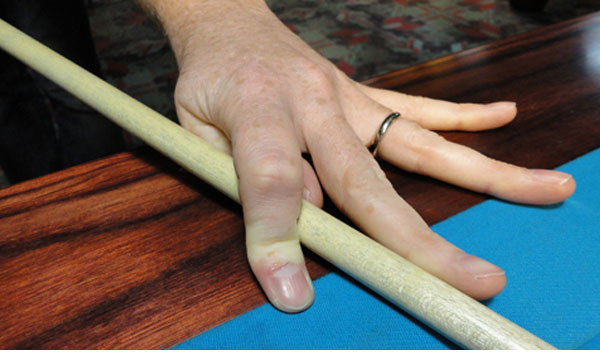
This bridge is very secure and allows the cue stick to stay nice and level. The top of the thumb acts as a guide for the cue while the middle and index fingers squeeze together to hold the cue securely in place.
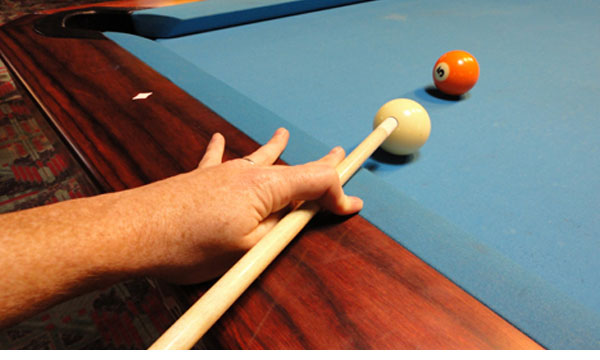

The Open Rail Bridge
This bridge is used when the cue ball is frozen or very close to the rail. It’s okay to scratch the cloth slightly with your tip on your warm up strokes. You will need to elevate just enough to contact the edge of the cue ball but no more.
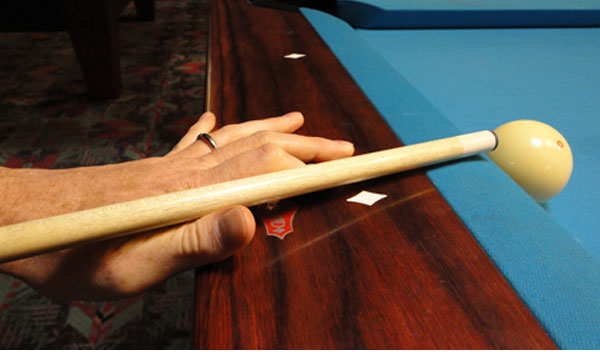
This bridge also allows the cue stick to stay very level. The open bridge enables you to better see the contact point down the shaft without the bridge finger getting in the way. When shooting this shot, do not try to do too much with the cue ball. Your contact area is limited so your biggest focus is to pocket the ball. Bending the index fingers also helps guide the cue and keep it secure.
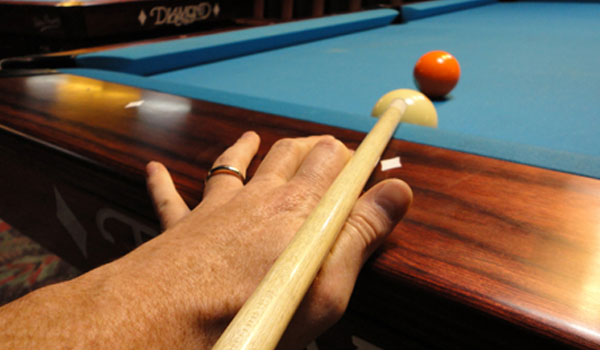

Elevated Bridge Over a Ball
This bridge is used when there is an object ball interfering with your standard bridge on the table. The objective is to elevate only as much as necessary to stroke over the obstructing ball without contacting it. For best results, line up with an open bridge as close to the object ball as possible. Slowly, elevate your cue shift the weight to the the tippy toes of your fingers. Remember to elevate only enough to clear the object ball.


Mechanical Bridge
The final bridge in our toolbox is the mechanical bridge, also known as the rest, the rake, the granny stick, and a number of other names. These can be found on the wall or underneath the table in most pool rooms. They come in various shapes and sizes. Unless your pool game is ambidextrous, you will want to brush up on your mechanical bridging skills. To begin, point your cue at the line of the shot. Next, carefully slide the mechanical bridge under the cue toward the pocket. Be sure to get the bridge head as close to the cue ball as you would with your bridge hand.
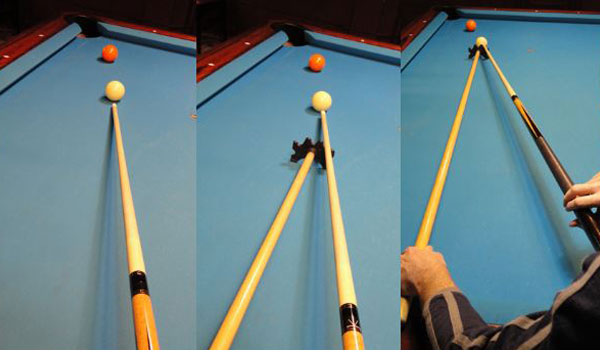
Now, flip your grip hand over and stroke the cue with a dart throwing motion. Keeping your bridge hand on the mechanical bridge, slide it over to the side so it does not interfere with your aim or stroke. The bridge will stay on the table but keep your hand on it to make sure its not going anywhere. Next, lower your head behind the shot and again, try to keep the cue stick as level as possible. Only elevate as much as necessary.

Bridging No-No's
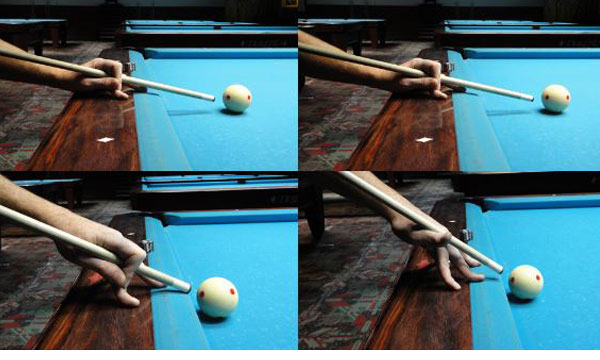
These are examples of how NOT to bridge when the cue ball is near the rail. The extra bridge on your hand, on the rail, only adds unnecessary elevation. It's important to keep the cue as level as possible to increase your precision and eliminate any unwanted swerve on the cue ball.
- RELATED ARTICLES
- The Proper Hand Bridge by Jeanette Lee – By PoolDawg Staff
- 6 Tips for Mastering the Mechanical Bridge – By Jennifer Barretta
- How to Shoot Off the Rail – By Mark Finkelstein