Your basic pool mechanics can be broken down into three main components, your bridge (the hand that secures the cue stick on the table), your grip (the other hand that moves the cue back and forth), and your stance (the feet placement). Today we're going to focus on having a winning pool stance.
Before we get started, you should remember that everyone is built differently. So what works for you may not work for your neighbor. Here are a few key points to keep in mind when finding your perfect stance:
1. Make sure you're comfortable.
You should not feel any tension or discomfort in your hamstrings or any other part of your legs. Try not to lock or hyperextend any joints in your body. Your legs should be relaxed.
2. Make sure you're balanced and stable.
Your feet should be firmly planted on the ground aligned in the direction of the shot. Think of a boxer's stance. They would never stand with their feet apart or too close together. Their feet are secure on the ground and you couldn't just walk up and knock them over.
3. Weight Distribution
Your weight should be evenly distributed between both legs. Do not have more weight in one leg or the other. This will only throw off your balance and cause unnecessary tension.
4. Bridge Hand Utility
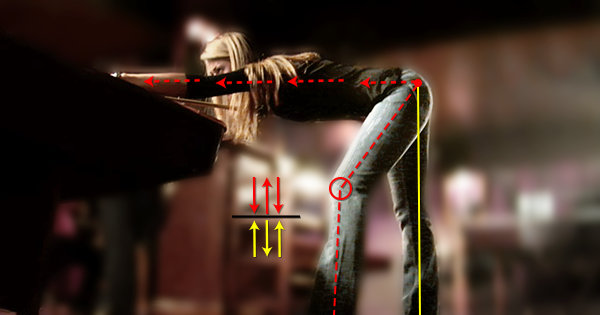
You should not be bearing much weight on your bridge hand. You should also be able to freely get up and down from the table by just bending at the waist. Extra weight in your bridge hand can mess with your stable balance.
5. Front Leg Etiquette
If you're going to bend a knee, make it the front one. This will give you much more stability than bending the back one or bending both.
When addressing the cue ball for a shot, step forward into your stance from behind the cue ball versus from the side or backward into the shot. This helps to reinforce your alignment and keeps the straight and positive momentum. When making your stance, I recommend starting with your feet approximately shoulder width apart and stepping straight forward with your opposite foot (if you shoot right-handed, step forward with your left foot). The toes of your back foot should fall just below your cue (see Diagram A).
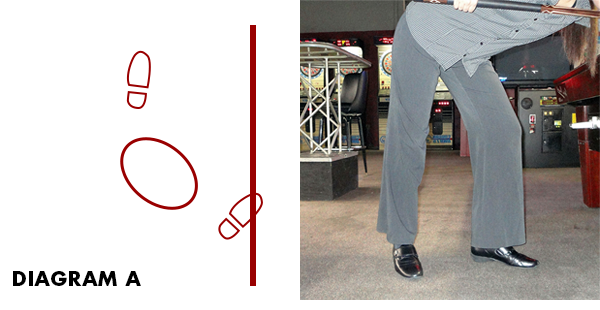
The stance in Diagram A meets all the suggested criteria. It's comfortable and stable and the weight is evenly distributed. Try to stay away from the not-so-steady stances.
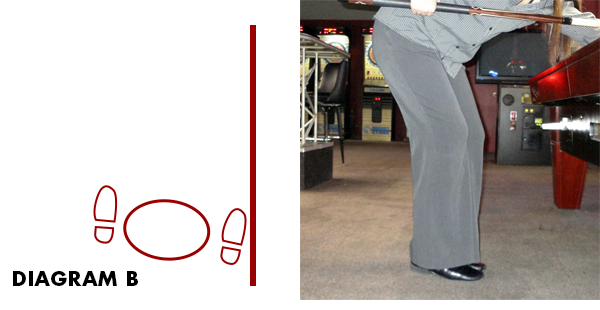
Both legs are bent in Diagram B stance which allows for too much spring action in the body. They should be secured in place with little room for extra movement. The feet so close together also inhibit proper balance.

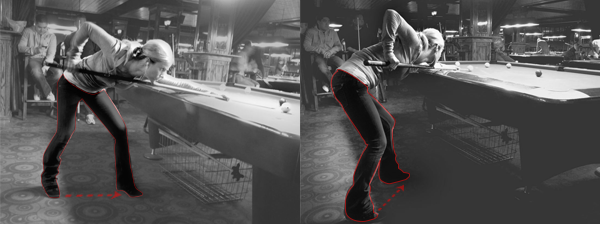
In the Diagram C stance are spread much too widely. Not only can this cause unwanted tension in the legs but when the legs are one in front of the other like this, it's like you're walking on a tight rope and it leaves a lot of wobble room.
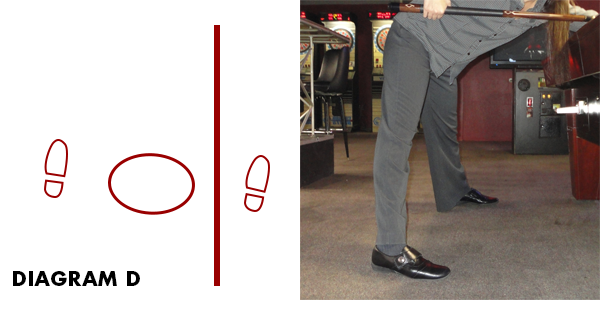
The same thing applies with the stance in Diagram D the wide stance is too spread apart and unstable. It can also cause unwanted tension and teetering.
Your height and your build will help determine the best stance for you. Until you find something that works, it's perfectly acceptable to shuffle your feet around until everything feels natural. Allow your stroke arm to fall into place and create your stance around that.
To check your stance alignment, get down on a shot, go through your warm up strokes and just as you're ready to pull the trigger, stand up without moving your feet. Which direction is your body pointed? Hopefully, it's pointed in the direction of the shot. Could you effectively throw a ball in that direction with the current placement of your feet? That can be a big indicator of your positioning.
Shorten your learning curve by developing proper fundaments. Your happy feet will make the rest of your body happy and play better.
- RELATED ARTICLES
- Weight on the Bridge Hand – By Tom Simpson
- How to Play Pool-The Fundamentals – By Florian "Venom" Kohler
- Proper Stance at the Pool Table-Jeanette Lee – By PoolDawg Staff
2 Comments